
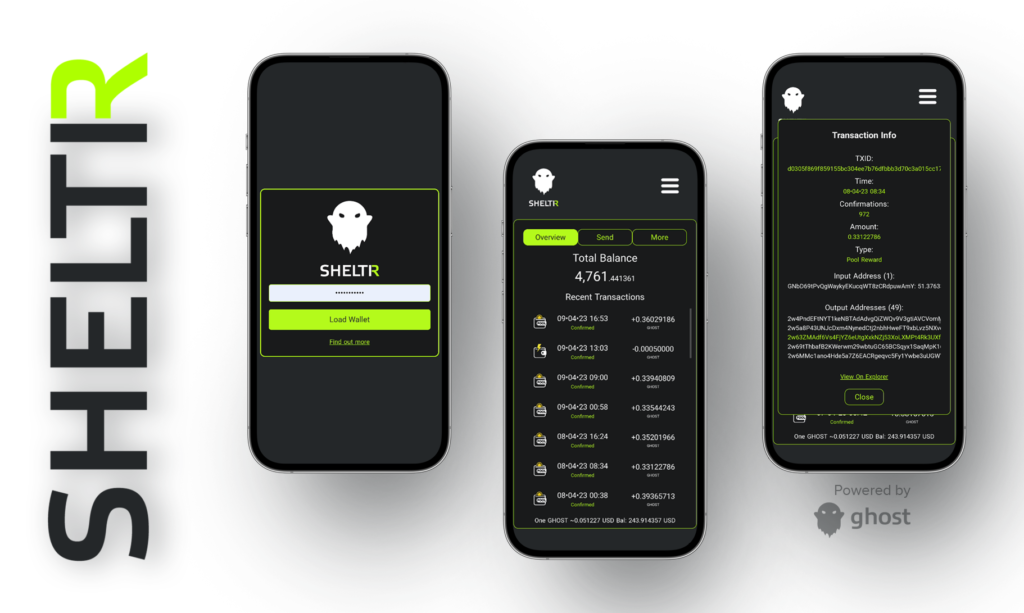
About SHELTR
SHELTR is a Progressive Web App (PWA) wallet designed specifically for Ghost Coin. Our PWA is built to provide a fast, reliable, and engaging experience for Ghost Coin users.
What is a PWA?
If you’re not familiar with what a PWA is, it’s a type of web application that combines the best of both worlds from native mobile apps and traditional websites. PWAs are designed to work seamlessly on any device or platform using a web browser.
Key Features
With SHELTR, you can securely store your Ghost Coins, view your balance, and send/receive transactions with ease, without requiring installation from an app store. SHELTR offers a range of features to provide you with the best possible user experience, including:
- One-click coldstaking setup to help you earn rewards while keeping your coins safe and secure.
- QR code scanning for easy address selection.
- URI support for quick access to SHELTR from external sources such as websites or other apps.
- Offline functionality to ensure you can access your wallet even without an internet connection.
- Translated into 19 different languages.
Browser Compatibility
- Chrome or Chromium based 71.0 or higher
- Firefox 70.0 or higher
- Safari 14.0 or higher
Brave is the recommended browser for use with SHELTR.
Setting Up SHELTR
Navigate to SHELTR
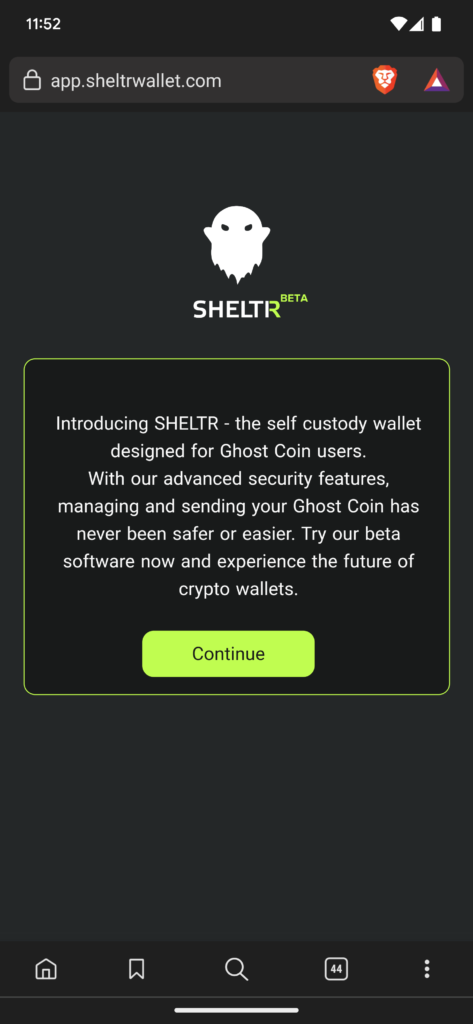
Navigate to https://app.sheltrwallet.com. Once there, tap the ‘Continue’ button.
Install the app
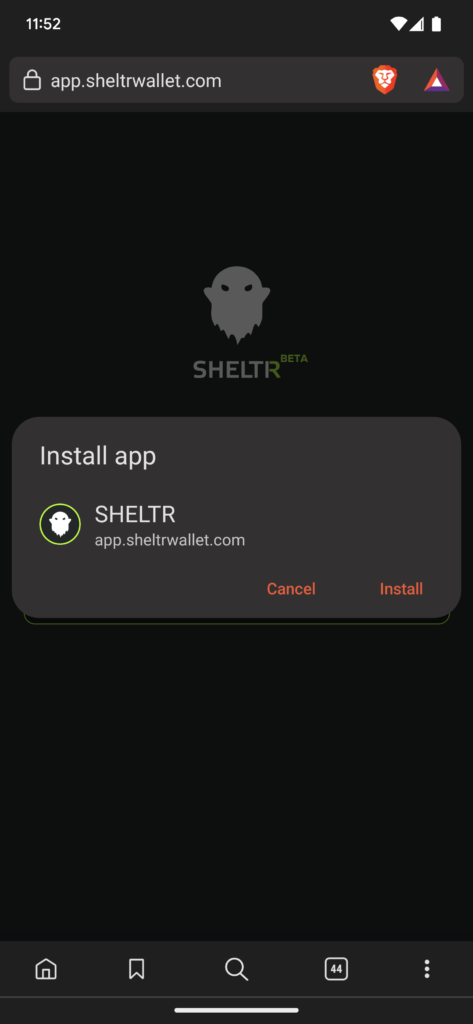
You should be prompted to install the app. This is the recommended way to use SHELTR as this gives a more native app feel.
Once you install the app, close the browser tab with SHELTR in it.
Note: Some browsers may not prompt to install. In that case, you can usually click the 3 dots for the browser, and select either ‘Install App’ option or ‘Add to Homescreen’
Open App From Home Screen
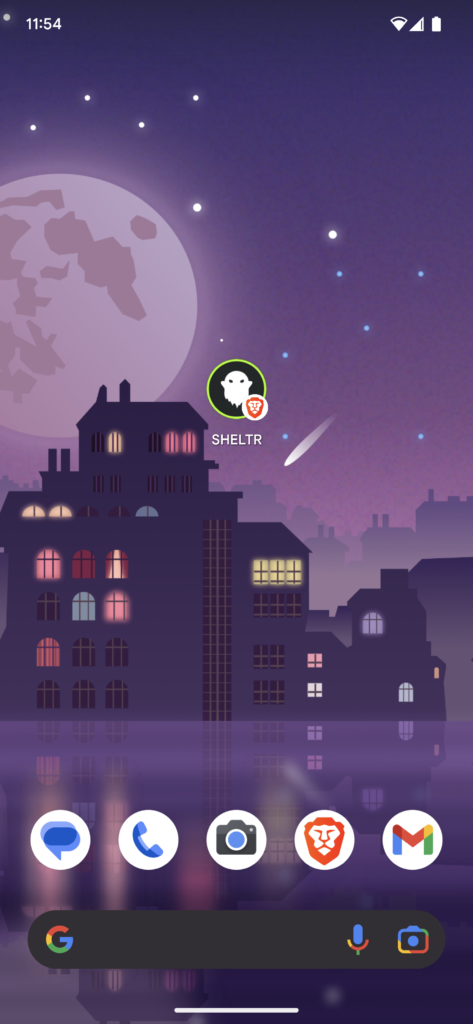
Locate the SHELTR app on your home screen and open it.
Create New Wallet

Once you have the app open, click the ‘Continue’ button on the first screen again, and now select ‘New’.
Note: You can also tap the ‘Import’ button to import words from Ghost-Core, Ghost-Desktop or GhostPayBot.
Copy the Mnemonic
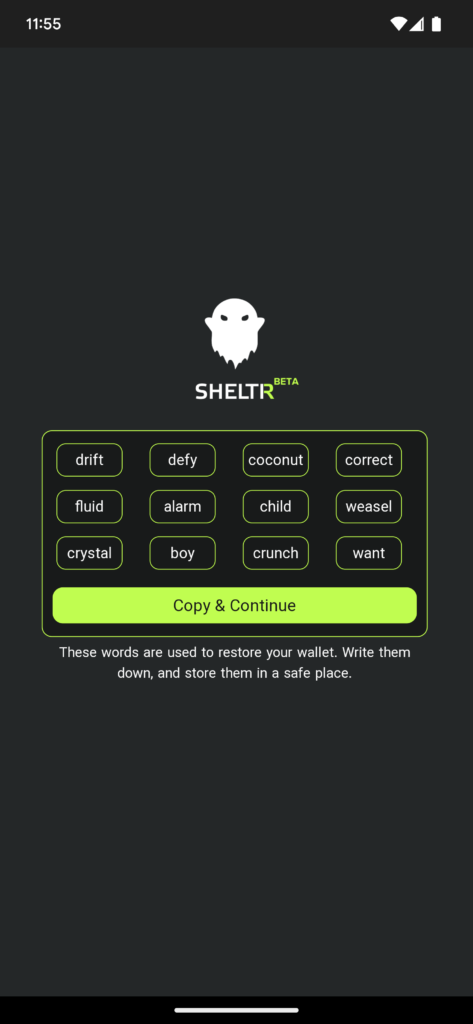
On this screen you will be presented with your mnemonic seed words. It is very important to keep these words safe as they are how you recover your wallet.
Click the ‘Copy & Continue’ button to copy the words to your clipboard and to advance to the next screen.
Paste Words Into Text Box
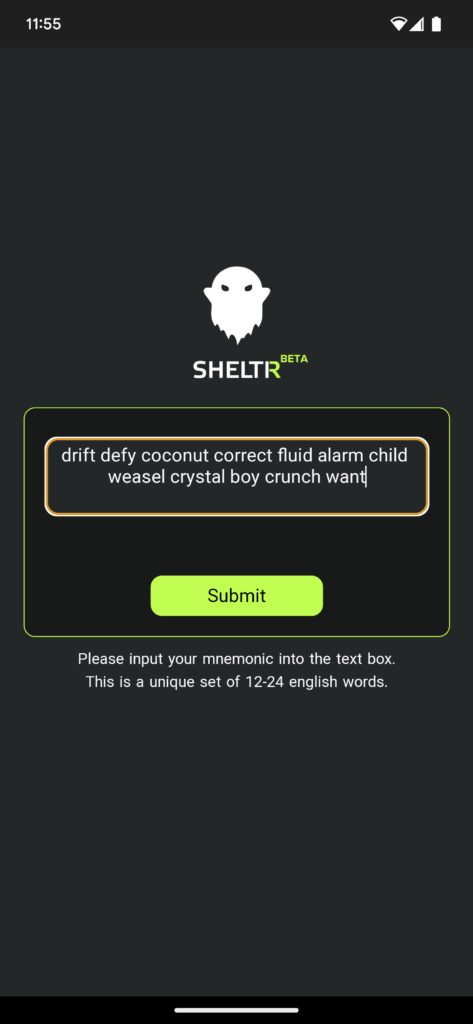
Now paste your words into the textbox and tap ‘Submit’.
Create Password
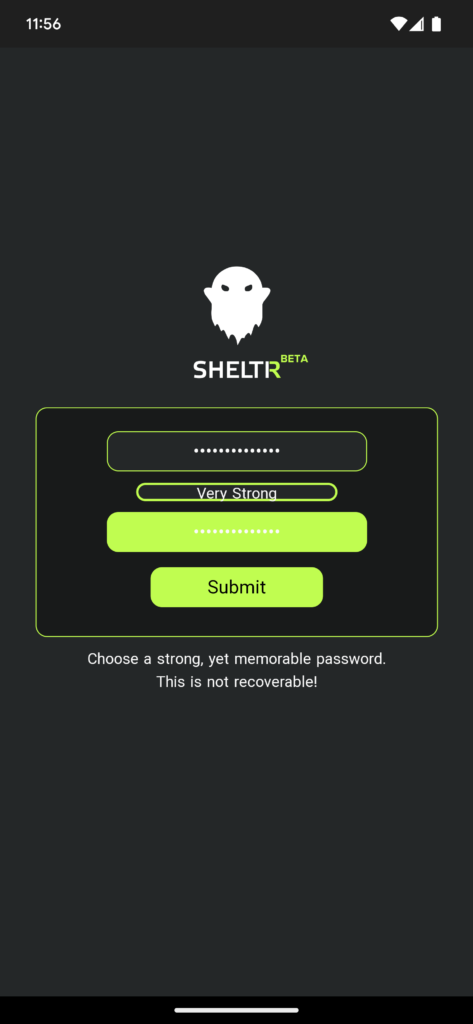
Create and strong password that you can remember. This is the encryption key for your wallet.
This password is not recoverable!
Load Wallet
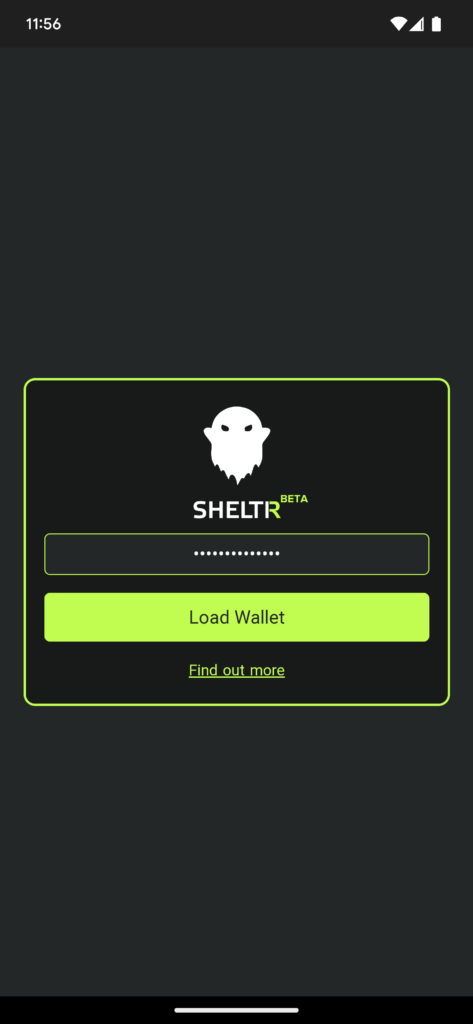
Now all you have left to do is load your wallet for the first time.
Simply put your password into the form and tap ‘Load Wallet’
The first load may take a little while. If you are importing an existing wallet, it may take longer also.
Wallet Loaded
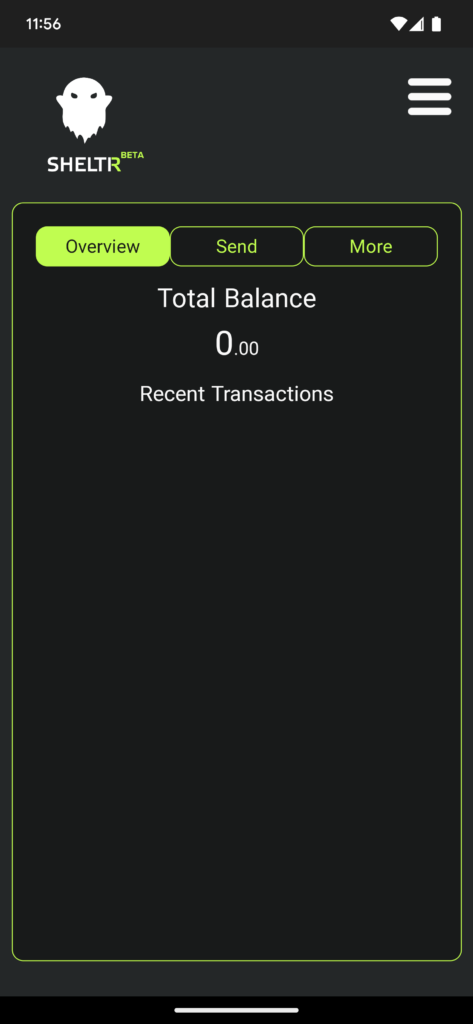
Your wallet is now running.
Funding Your Wallet
Get Receiving Addresses
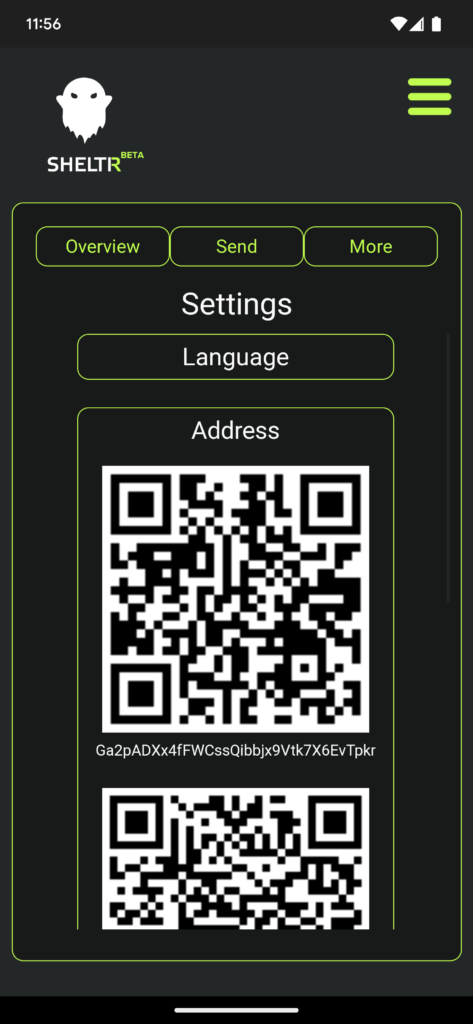
Load your SHELTR wallet. Once loaded, tap the 3 lines in the corner to enter the Settings menu. Once in the Settings menu, tap the Address option.
You can send $GHOST to any of the addresses that you see there.
Coldstaking Setup
Select pool
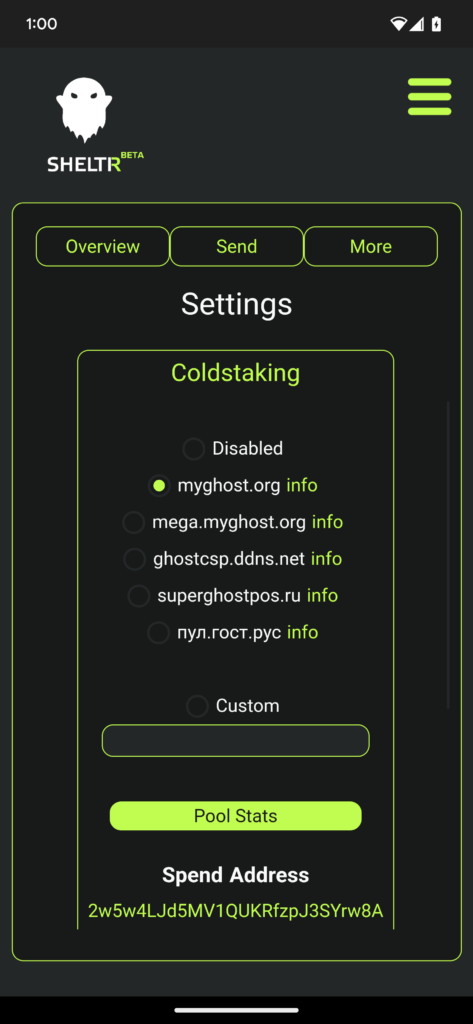
Load your SHELTR wallet, then tap the 3 lines in the corner to open the Settings menu.
Once in the settings menu, select ‘Coldstaking’ to see the options. From here simply select the pool you wish to use.
When the word ‘Coldstaking’ tunrs green, then you know it’s working!
If you do not see your pool in the list, or if you are using a GhostVault to stake, then select the ‘Custom’ option.
Then paste either the pools stake key or the GhostVault extended public key into the field.
Zap Coins
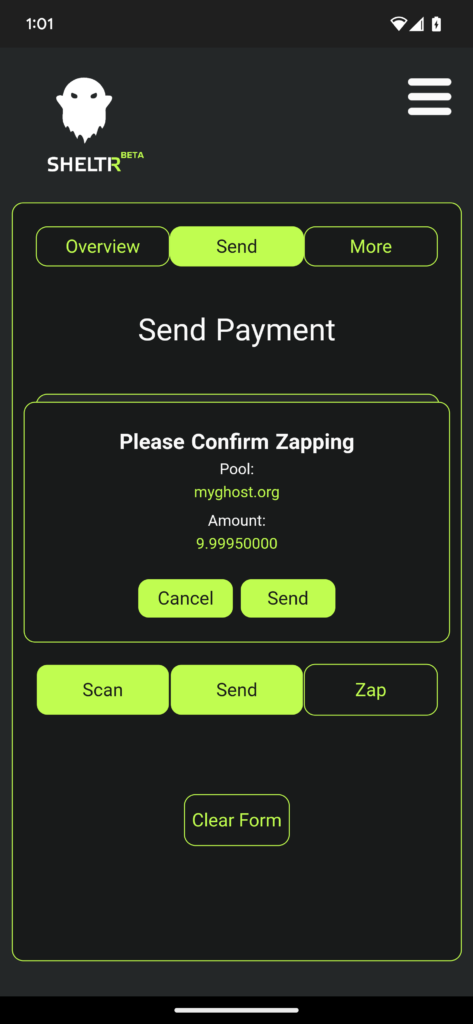
Now navigate to the ‘Send’ tab. On the send tab, enter your password into the form, then tap the ‘Zap’ button.
Once the transaction processes, you will be asked to confirm that you want to zap.
Tap ‘Send’ to finalize and broadcast the transaction to the Ghost network.
Confirm Staking
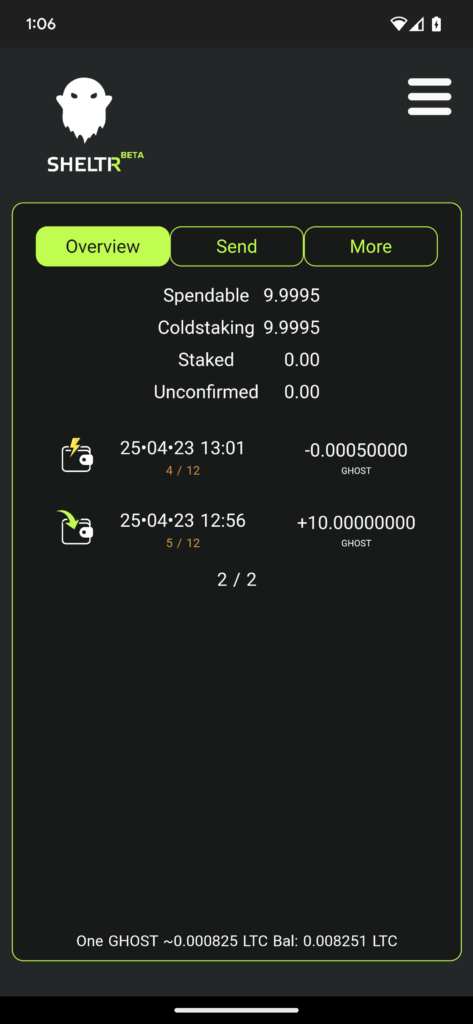
Now, back on the ‘Overview’ tab, you will see the Zap transaction.
You can also tap the ‘Total Balance’ area to see an extended balance view. Here you can see that your coins are in a coldstaking script.
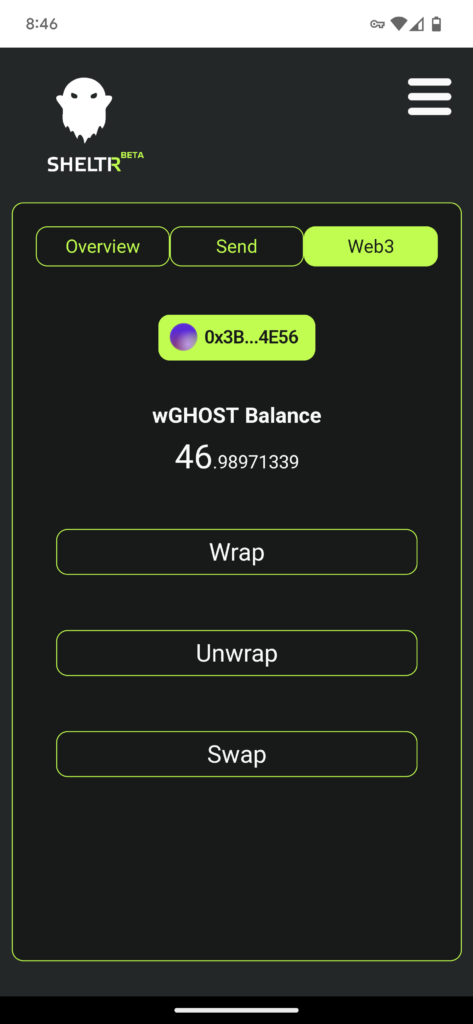
Polygon Bridge
Connect to web3 wallet
To begin using wGHOST with SHELTR, you will first need to connect your web3 wallet to the SHELTR application.
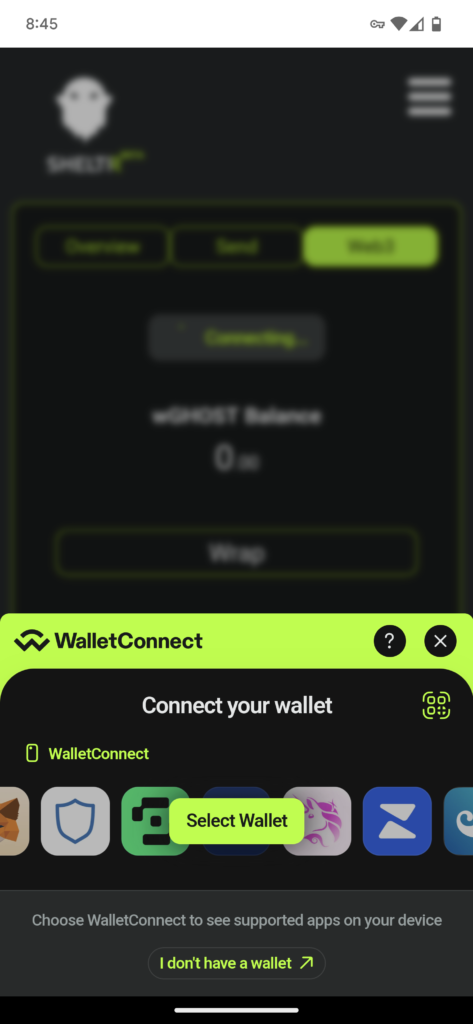
Navigate to the web3 tab in the SHELTR app, then tap the Connect Wallet button.
This will bring up the wallet connection modal. Press the Select Wallet button.
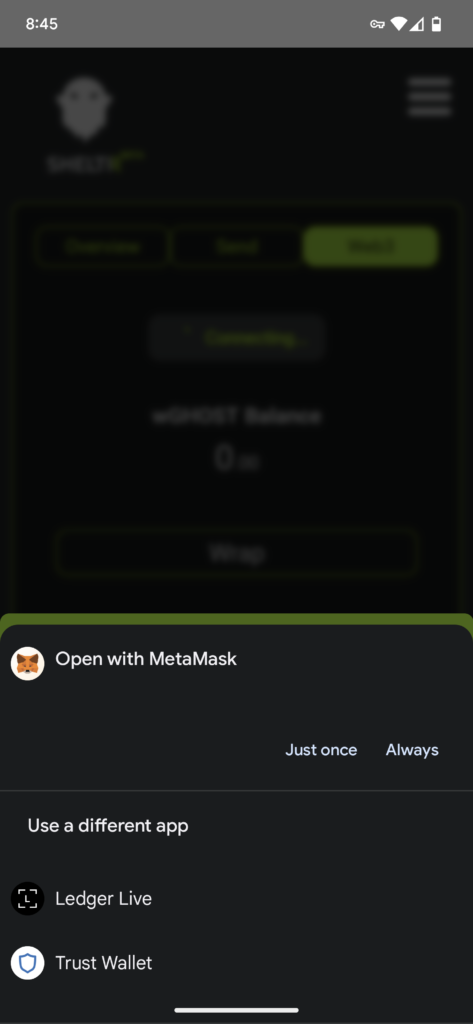
For this demonstration, we are using the MetaMask app, although other apps are similar.
Once your web3 wallet of choice is loaded, follow the prompts to connect your wallet.
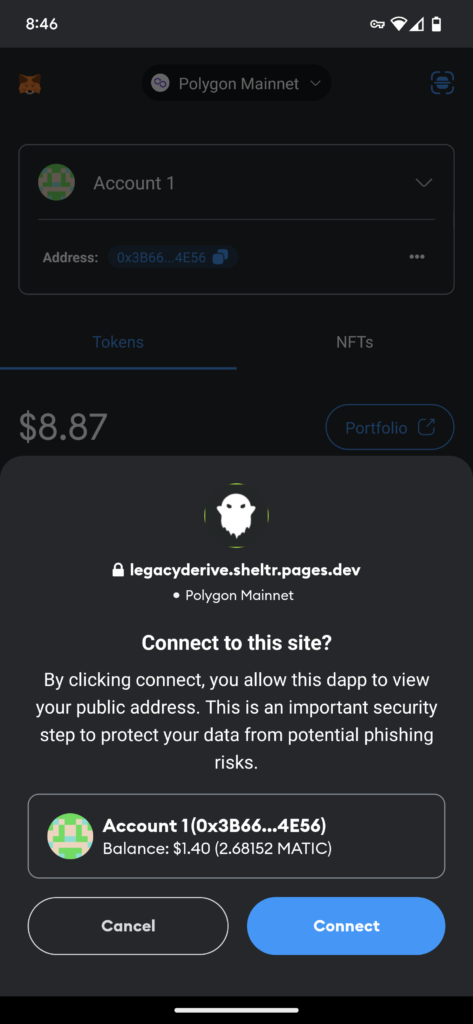
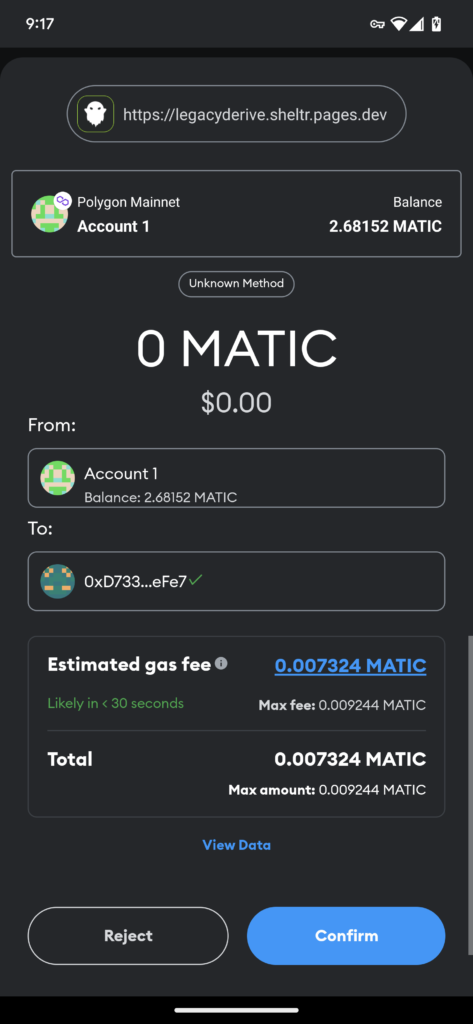
In the MetaMask app, this is done by pressing the blue Connect button.
Once connected, you will be returned back to the SHELTR app.
Wrapping Ghost
SHELTR makes it very easy to turn your Ghost into wGHOST.
To begin, fund your SHELTR wallet with Ghost.
See the Funding your wallet section for more info.
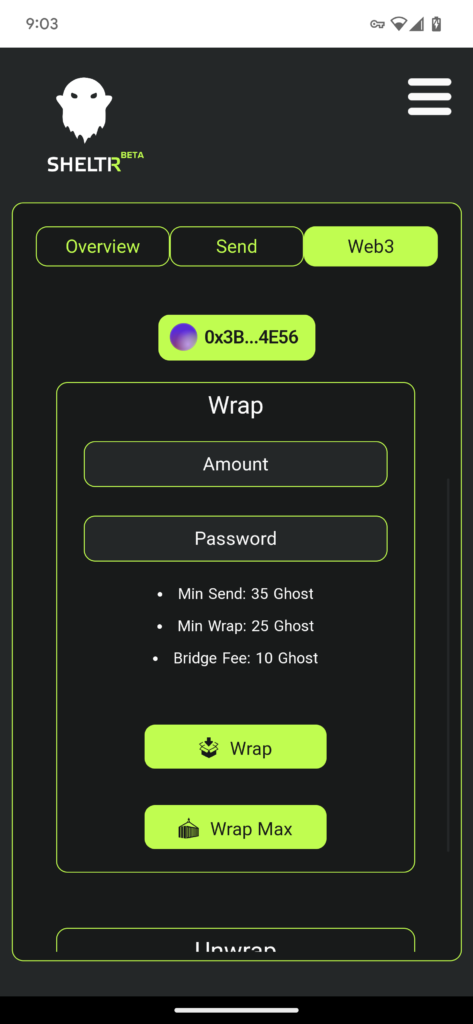
Navigate to the web3 tab, and select the Wrap button. This is show the wrapping interface.
In the amount field goes the amount of wGHOST you would like to receive on the Polygon network.
All fees will be added after.
The Minimum amount that can be bridged is 25 Ghost, and there is a fee of 10 Ghost. This means that the Minimum amount that you can send is 35 Ghost in total.

On the next screen you will be asked to confirm the transaction. There will be a breakdown of how the fees are applied and how much you will recieve.
Once the wrapping transaction has received 6 confirmations on the Ghost blockchain, your wGHOST will be minted to your address.
Unwrapping Ghost
Just as easily as you can turn Ghost into wGHOST, you can unwrap your wGHOST into Ghost.
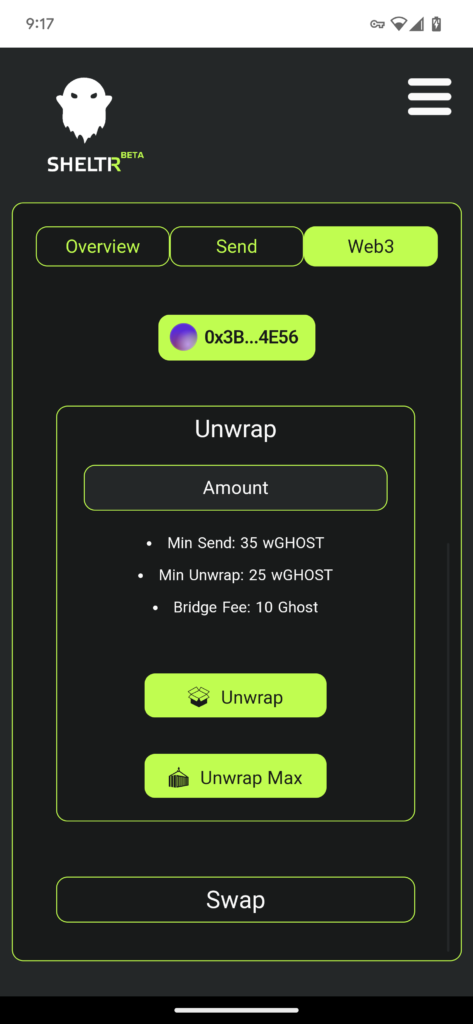
Navigate the the web3 tab in your SHELTR wallet and select the Unwrap option.
From here enter the Amount that you want to receive in Ghost.
All fees will be added afterwards.
The Minimum amount that can be bridged is 25 wGHOST, and there is a fee of 10 wGHOST. This means that the Minimum amount that you can burn is 35 wGHOST in total.
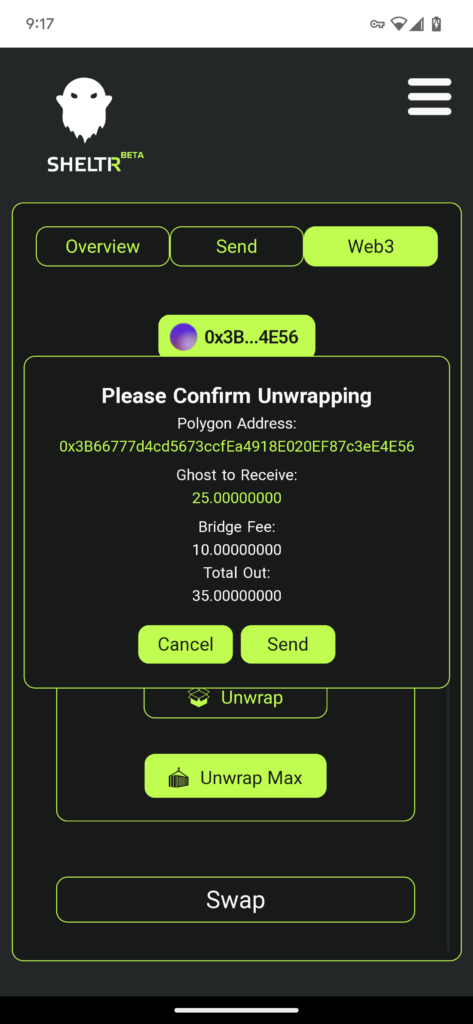
Next you will be asked to confirm wrapping.
You will be displayed the breakdown of the fees and total amount being sent.
If you are satisfied, press the Send button. You will then be directed to your web3 wallet.
In your web3 wallet you can then confirm the transaction.
After your Unwrap transaction has received 6 polygon network confirmations, your Ghost Will be paid out at the next Ghost block.